
One thing people who keep learning have in common is an environment that makes sitting down at their desk something to look forward to. In this article, we introduce tips for the search words to use when finding real photos of your ideal desk on Pinterest, plus 9 items that work, organized into three steps: looks, cables, and comfort. Even without a big makeover, you can upgrade your desk little by little.
Find your ideal desk on Pinterest
Before you start, first find an image of the goal. Our recommendation is Pinterest.
A service where you can search images gathered by people around the world and save (pin) them to your own boards. The sheer volume of real desk-area photos is overwhelming, making it the strongest for finding a finished image of “the desk I want.” As you pin photos you like, more photos with a similar mood keep showing up in your recommendations.
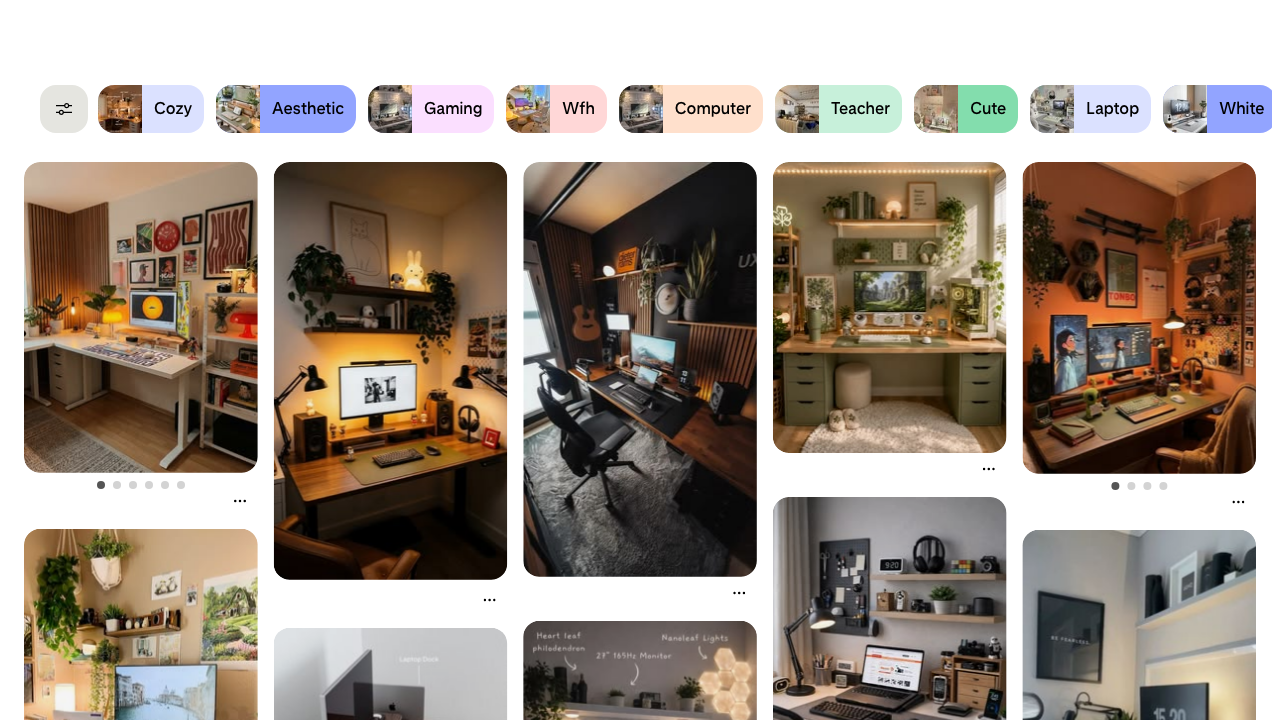
Tips for search words
Even for the same desk photos, the world that shows up changes with the words you search.
- “desk tour” — someone walking through their own desk. Easy to imitate
- “desk setup” — the broadest term. The sheer volume is on another level
- Combine words to narrow to your taste — “desk setup minimal,” “cozy desk setup,” “gaming desk setup,” “small desk setup,” “white desk setup”
- Use the filter buttons that appear above the search results — “monochrome,” “minimalist,” “aesthetic,” and more let you follow your taste even without thinking of the words yourself
Step 1: The two things that change the look instantly
As you browse real photos, you’ll notice there are a few regulars that show up again and again. The fastest route is to start with the largest areas—your desktop surface and the light on your hands.
Desk mat
A large mat you lay on top of your desk. Just laying one down changes your desk’s impression the most—the most cost-effective upgrade there is. It also softens your keyboard’s typing noise and prevents scratches on the desk.
Felt suits a calm mood: a matte surface with no glare, and writing with a pen on top of it still feels soft. Faux leather is the photogenic choice: the firmer surface lets a mouse glide, and spills wipe right off. Reversible types with a different color on the back let you change the mood by mood.
Monitor light
A light that hooks onto the top of your monitor to illuminate your hands. It’s designed so the light doesn’t reflect on the screen, and it clearly reduces eye fatigue during night work. Unlike a desk lamp, it doesn’t take up space, which is a welcome point on a small desk. A type with adjustable color temperature lets you switch between whitish light while working and warmer light at night.
If you also want the “wall glowing softly” mood you see in real photos, pick a model that lights up the back as well—it covers your hands and the wall at once, so you don’t need to buy separate indirect lighting.
Step 2: Hide the cables and it becomes a “real photo” desk
The biggest reason the desks in real photos look tidy is actually that the wiring is out of sight. With the same desk and the same gear, just banishing cables under the desk makes the look a different thing entirely. And per item, this is the cheapest category of all.
Cable tray
A rack you attach under the desk to gather and hide power strips and bundles of cables. A clamp type attaches without drilling holes in the desk. Around 60cm wide fits one strip plus a few adapters.
Power strip
What works as a set with the tray is replacing the strip itself. Pick one that fixes in place with magnets or a clamp, and you can float it under the desk or on a leg instead of letting it roll around the floor. Individual switches per outlet also cut standby power for gear you aren’t using.
Cable clips and holders
The problem of charging cables sliding off behind the desk is solved by holders you stick on with double-sided tape. Just giving your charging cable, earphones, and USB drive a fixed home cuts down what’s left lying on the desk. It’s the smallest upgrade here, and you can try it for pocket change.
Step 3: Add height and comfort
Once the look is settled, next come the small things that make the time you spend at the desk pleasant. There’s no need to buy these at once—one at a time, whichever catches your eye, is plenty.
Monitor stand
A stand that lifts your monitor or laptop a little. Your line of sight rises so you’re less likely to hunch, and the space underneath becomes a home for your keyboard, which effectively widens your desk. A model with a keyboard slider lets you push the keyboard away when you aren’t using it.
Headphone stand
Headphones set straight on the desk take up space, and the ear pads wear out faster. Just making one place to hang them frees up the desktop and doubles as the “display storage” look you see in real photos.
Fake greenery
A small houseplant (an artificial version that looks just like the real thing). Just one bit of green on a desk full of gadgets raises both photo appeal and comfort a notch. Being fake, it needs no watering and there’s no worry of bugs, making it the most effortless place-it-and-done upgrade.
Study timer
If your phone’s timer means you set out to measure time and end up reading notifications, a dedicated timer helps. Deciding “just 25 minutes” and pressing start lowers the hurdle of beginning a lot. A model you can switch to silent (a light instead of a beep) works even in a shared room.
You don’t have to get everything at once
You don’t need to buy everything from the start. Even upgrading just one thing first, living with it for a while, then moving on to the next is effective enough. Each upgrade makes sitting down at your desk a little more fun, and that accumulation ties into how easily you keep learning.
Summary
- The first step of an upgrade isn’t shopping—it’s finding an image of the goal on Pinterest
- Start searching with “desk tour,” then widen it with “desk setup” and combined words like “cozy” or “minimal”
- The big-effect order is desk mat → monitor light → hiding cables → height → small things
- The cheapest thing that works is getting cables out of sight (tray, strip, holders)
- Rather than getting everything at once, the trick to keeping it up is to upgrade one thing, sit back and admire it, and repeat
An environment that makes you want to sit at your desk is itself the strongest learning tool.